Introduction to Video Editing Tips
Video editing is one of those skills that can completely change the way your content looks and feels. You can record a decent video with a phone, camera, or webcam, but editing is where the real magic happens. It is the stage where raw footage turns into a clean, engaging, and professional-looking final video. Whether you are creating YouTube videos, reels, vlogs, business content, tutorials, or short films, knowing the right video editing tips can make your work stand out.
A lot of beginners think video editing is only about cutting clips and adding music, but it is much more than that. Good editing controls the pace, mood, story, sound, colors, and overall experience of the viewer. Even a simple talking-head video can feel polished when the cuts are clean, the audio is clear, the visuals are balanced, and the message flows naturally. On the other hand, poor editing can make even high-quality footage look boring or confusing.
The best thing about video editing is that you do not need to become a Hollywood-level editor to create great content. You just need to understand the basic principles and practice them consistently. Small improvements, like removing awkward pauses, balancing audio, using smooth transitions, and correcting colors, can make a huge difference. This article will walk you through practical and expert-level video editing tips in a casual, easy-to-understand way.
Plan Your Video Before You Start Editing
One of the most important video editing tips is to plan before you even open your editing software. Many beginners jump straight into editing without knowing what they want the final video to look like. This usually leads to wasted time, messy timelines, and confusing results. A simple plan can save you hours and help you edit with more confidence.
Before editing, watch your footage and think about the purpose of the video. Ask yourself what message you want to deliver, who the video is for, and what feeling you want viewers to have after watching it. For example, a travel vlog should feel exciting and immersive, while a business video should feel clear, trustworthy, and professional. When you know the goal, every editing decision becomes easier.
You should also organize your clips before starting. Create folders for main footage, B-roll, music, sound effects, graphics, and exports. Rename important clips if needed so you do not waste time searching later. A clean workflow may not sound exciting, but professional editors rely on organization because it keeps the editing process smooth and stress-free.
Keep Your Cuts Clean and Purposeful
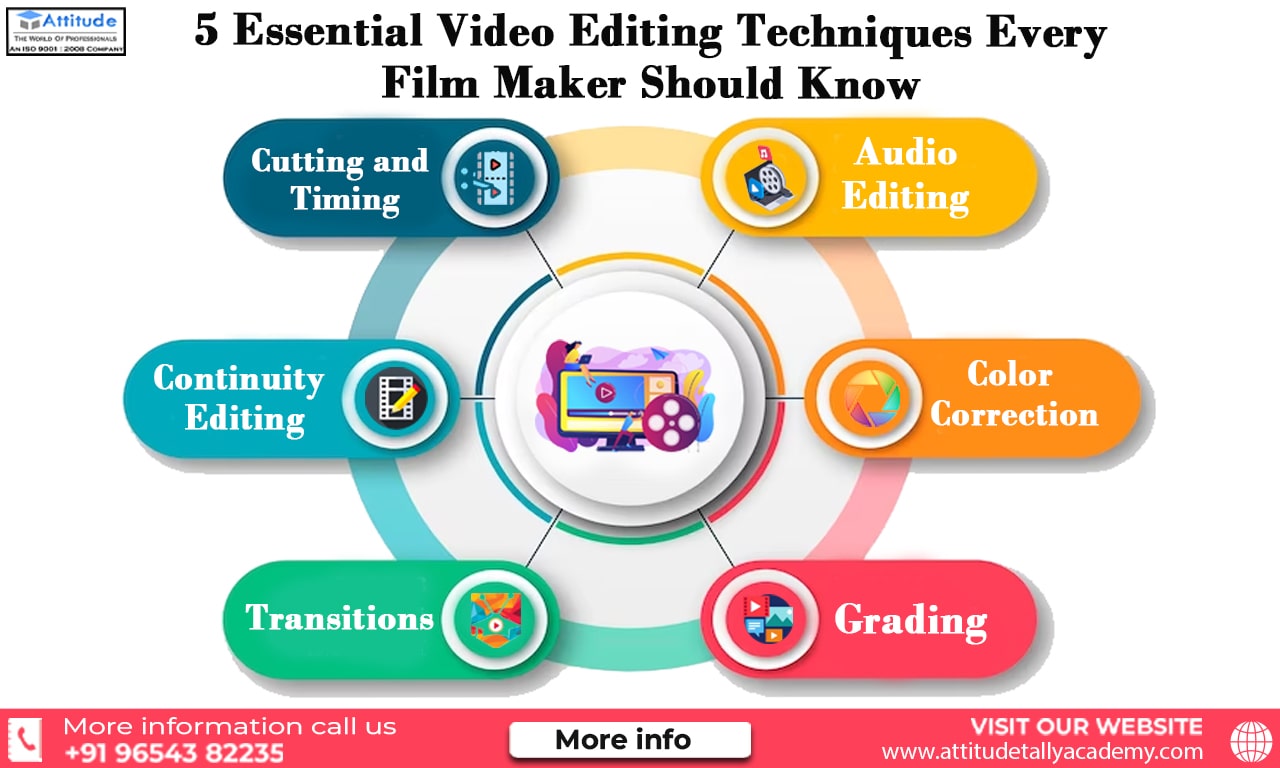
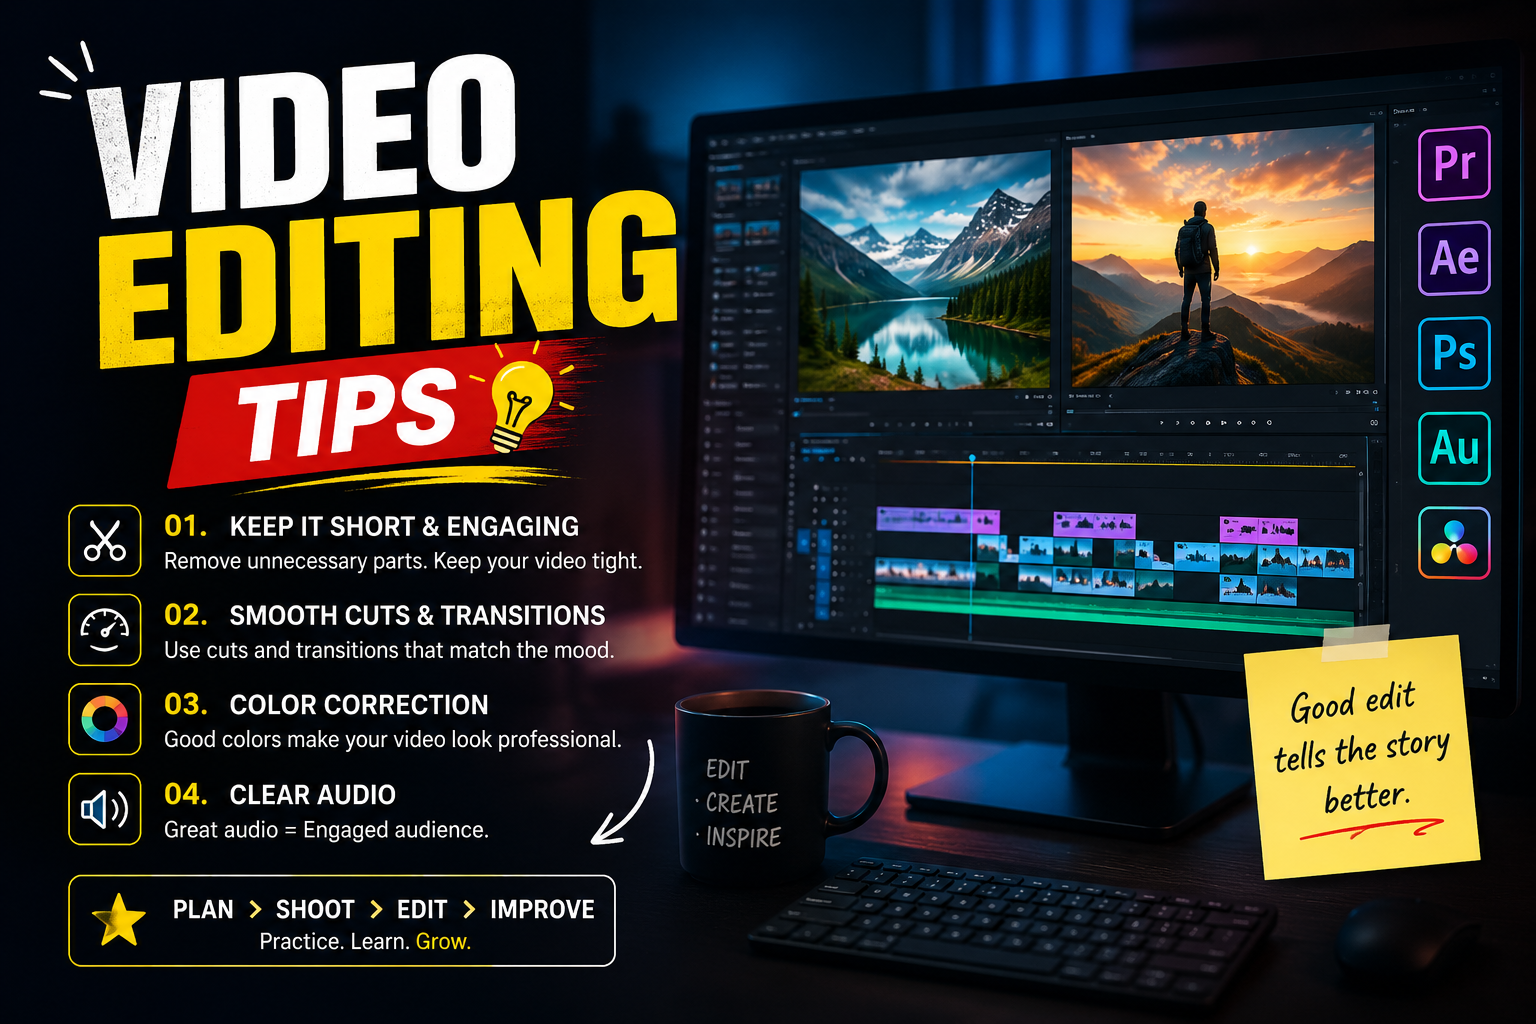
Clean cutting is the foundation of good Video Editing Tips. A cut should not feel random or distracting. It should help the story move forward, remove unnecessary parts, or improve the rhythm of the video. If a clip does not add value, remove it. Viewers today have short attention spans, so every second matters.
One simple technique is to cut out long pauses, repeated words, mistakes, and boring moments. This is especially useful for talking-head videos, tutorials, and interviews. However, be careful not to overcut. If every sentence is chopped too tightly, the video may feel robotic or unnatural. The goal is to make the video smooth, not rushed.
Another helpful tip is to cut on action. This means making your cut during movement instead of after the movement stops. For example, if someone turns their head, opens a door, or picks up an object, cutting during that action feels more natural. This technique helps hide edits and keeps the viewer focused on the story rather than the cut itself.
Use Transitions Carefully
Transitions can make a video look stylish, but only when used properly. One of the most common beginner mistakes is using too many flashy transitions. Spinning, zooming, sliding, and glitch effects may look fun at first, but they can quickly make a video feel cheap or distracting. Professional editing usually uses transitions in a subtle and meaningful way.
The most useful transition is still the simple cut. In many cases, a clean cut is better than any effect. Fade-ins, fade-outs, and cross dissolves can also work well when you want to show time passing, Video Editing Tips change scenes, or create a softer mood. These transitions are simple, but they are effective because they do not pull attention away from the content.
If you are editing social media content, fast transitions can work, but they should match the energy of the video. For example, a fitness video, fashion reel, or event highlight can use quick zooms or whip transitions if the music supports them. The key is consistency. Choose a transition style that fits your video and use it with control.
Pay Attention to Audio Quality
Audio is often more important than video quality. Viewers can forgive slightly imperfect visuals, but they usually cannot tolerate bad sound. If your audio is too low, noisy, echoey, or unbalanced, people may stop watching no matter how good the visuals are. That is why one of the most valuable video editing tips is to treat audio seriously.
Start by adjusting the volume levels. Dialogue should be clear and easy to hear, while background music should support the video without overpowering the speaker. If music is too loud, it becomes annoying. If it is too low, it may not add any emotion. A good balance makes the video feel polished and comfortable to watch.
You should also remove background noise when possible. Many editing programs have noise reduction tools that can reduce hums, fans, wind, or room noise. Do not overuse noise reduction, though, because it can make voices sound unnatural. Clean audio should sound natural, warm, and clear. Good sound design can instantly make your video feel more professional.
Choose Music That Matches the Mood
Music has a powerful effect on how people feel while watching a video. The same footage can feel emotional, exciting, funny, dramatic, or luxurious depending on the music you choose. That is why music selection is not just a background detail. It is part of the storytelling.
When choosing music, think about the mood of your video. A corporate explainer may need calm and confident music. A travel video may need something cinematic or upbeat. A motivational video may need a strong build-up. A product video may need clean, modern, and premium-sounding music. The music should support the message, not fight against it.
Also, edit your cuts according to the beat when possible. Cutting on the beat makes the video feel more rhythmic and satisfying. This works especially well for reels, montages, fashion videos, sports edits, and promotional content. You do not need to cut every beat, but syncing important moments with music can make your video feel much more engaging.
Use B-Roll to Make Videos More Interesting
B-roll is extra footage that supports the main video. For example, if someone is talking about making coffee, B-roll could show coffee beans, pouring water, close-ups of the cup, or steam rising. B-roll makes videos more visually interesting and helps explain what is being said.
One of the best video editing tips for beginners is to use B-roll to cover cuts. If you remove a mistake or pause in a talking-head video, the cut may look jumpy. Placing B-roll over that cut hides the jump and keeps the video smooth. This is a common professional editing technique used in interviews, documentaries, tutorials, and YouTube videos.
B-roll also helps maintain viewer attention. Watching the same shot for too long can become boring, even if the content is useful. Adding relevant visuals gives the viewer something fresh to look at. Just make sure the B-roll matches the topic. Random clips may look nice, but if they do not support the message, they can confuse the viewer.
Improve Your Color Correction and Color Grading
Color correction and color grading can dramatically improve the look of your video. Color correction means fixing the colors so the footage looks natural. This includes adjusting exposure, contrast, white balance, highlights, shadows, and saturation. Color grading means giving the video a specific Video Editing Tips style or mood after the correction is done.
Start with basic corrections before applying creative looks. Make sure skin tones look natural, whites are not too yellow or blue, and the image is not too dark or too bright. Many beginners apply heavy filters without correcting the footage first, which can make the video look unnatural. A clean base is always better.
After correction, you can add a creative grade. For example, warm tones can make a video feel friendly or nostalgic. Cooler tones can feel modern, serious, or cinematic. Higher contrast can create a bold look, while softer contrast can feel elegant and calm. The goal is not to make the colors extreme, but to support the emotion and style of the video.
Keep Text and Graphics Simple
Text and graphics can help explain information, highlight key points, and make a video look more professional. However, they should be easy to read and visually clean. Too many fonts, colors, animations, or effects can make your video look cluttered. Simple graphics often look more premium than complicated ones.
When adding text, choose fonts that match the Video Editing Tips of your video. Use large enough text so viewers can read it easily, especially on mobile screens. Keep the text on screen long enough for people to understand it, but not so long that it becomes distracting. Good text should support the video, not compete with it.
Lower thirds, captions, titles, and callouts should follow a consistent style. Use the same font, color style, and animation throughout the video. Consistency makes your content look branded and professional. Even if your video is simple, clean graphics can make it feel more polished and intentional.
Master the Art of Pacing
Pacing is about how fast or slow your video feels. A video with good pacing keeps viewers interested from start to finish. A video with poor pacing may feel boring, rushed, confusing, Video Editing Tips or exhausting. Pacing depends on your cuts, music, scene length, pauses, and overall rhythm.
For fast-paced content like reels, ads, sports edits, and fashion videos, quick cuts can create energy. But for emotional videos, interviews, educational content, or cinematic scenes, slower pacing may work better. The important thing is to match the pace with the purpose of the video. Not every video needs to be fast.
A good way to check pacing is to watch your edit without distractions. If your mind starts wandering, the video may be too slow. If you feel overwhelmed, it may be too fast. Professional editors often watch their videos multiple times and make small timing adjustments until everything feels natural.
Avoid Overediting Your Videos
Overediting is a common problem, especially when you are excited about effects and tools. Too many zooms, sound effects, transitions, filters, stickers, and animations can make the video feel messy. Good editing is not about showing every effect you know. It is about making the viewer enjoy the content without noticing the editing too much.
Before adding an effect, ask yourself if it improves the video. Does it make the message clearer? Does it create emotion? Does it improve the flow? If the answer is no, you probably do not need it. Simple editing often looks more professional than heavy editing.
This does not mean you should avoid creativity. Creative edits can be powerful when they match the style of the content. The point is to edit with intention. Every cut, effect, sound, and graphic should have a reason. When you edit with purpose, your videos look cleaner and more professional.
Use Captions for Better Engagement
Captions are extremely useful, especially for social media videos. Many people watch videos without sound, so captions help them understand the content even when the audio is off. Video Editing Tips Captions also make your videos more accessible and easier to follow.
When adding captions, make sure they are accurate and easy to read. Avoid tiny text or overly decorative fonts. Captions should be placed where they do not cover important visuals, faces, or product details. For short-form content, bold and clear captions can improve viewer retention.
You can also use captions creatively by highlighting important words or phrases. This helps guide attention and makes the video feel more dynamic. However, do not animate every single word too aggressively unless the style fits the platform. Clean, readable captions are usually better than overly busy ones.
Export Your Video with the Right Settings
After editing, exporting is the final step, and it matters more than many beginners realize. Wrong export settings can make a good video look blurry, compressed, or low-quality. Always choose settings that match where the video will be uploaded or displayed.
For most online videos, exporting in MP4 format with H.264 codec is a safe choice. Make sure the resolution matches your project, such as 1080p, 4K, or vertical 1080×1920 for short-form videos. If you edited in high resolution but export at a low setting, your final video may lose sharpness.
Also, check your bitrate. A very low bitrate can make the video look pixelated, especially in scenes with movement. A higher bitrate usually gives better quality, but it also creates a larger file. The best setting depends on your platform and video type. Before posting, always watch the exported file from start to finish to catch any mistakes.
Review Your Final Edit Like a Viewer
One of the most useful video editing tips is to review your video from the viewer’s perspective. After spending hours editing, it is easy to become too familiar with the footage. You may miss mistakes because your brain already knows what is supposed to happen. Taking a short break before reviewing can help you see the video more clearly.
Watch the final version without stopping. Pay attention to the flow, sound, visuals, text, and overall feeling. Ask yourself if the beginning grabs attention, if the middle stays interesting, and if the ending feels complete. Also check for small errors like spelling mistakes, awkward cuts, audio pops, black frames, or mismatched colors.
It can also help to show the video to someone else before publishing. A fresh pair of eyes may notice things you missed. You do not need to accept every suggestion, but feedback can help improve the final result. Professional editors review their work carefully because small details often separate average videos from great ones.
Build Your Own Editing Style
As you practice, you will start developing your own editing style. This is important because style helps your content become recognizable. Some editors prefer fast, energetic cuts. Others like smooth cinematic pacing. Some focus on clean corporate edits, while others enjoy bold social media effects. Video Editing Tips There is no single perfect style.
To build your style, study videos you enjoy and notice how they are edited. Look at the pacing, music, colors, transitions, captions, and camera choices. Do not copy everything directly, but learn from what works. Over time, you can combine different influences and create something that feels like your own.
Your style should also match your audience. A gaming audience may enjoy fast edits and humor, while a luxury brand audience may prefer clean visuals and elegant pacing. A teaching channel may need clarity above everything else. The best editing style is the one that supports your message and connects with your viewers.
Practice Consistently and Keep Learning
Video editing is a skill that improves with practice. Video Editing Tips You may not create perfect edits in the beginning, and that is completely normal. Every editor starts somewhere. The more videos you edit, the faster and better you become. You start noticing timing, sound, color, and storytelling details that you used to miss.
Try editing different types of videos to improve your range. Edit a vlog, a product video, a short reel, an interview, a tutorial, or a cinematic montage. Each format teaches you something different. Short videos help you understand pacing, while longer videos teach structure and storytelling. Product videos improve your attention to detail, and interviews teach audio and flow.
Also, save your old projects and compare them with your newer work. This is a great way to see your progress. You will notice that your cuts become cleaner, your audio improves, and your overall videos feel more professional. Consistent practice is one of the most reliable ways to become a strong video editor.
Conclusion
Video editing is not just about software, effects, or expensive tools. It is about making smart creative decisions that improve the viewer’s experience. When you plan your video, organize your footage, cut with purpose, balance your audio, use music wisely, add helpful B-roll, correct colors, and keep graphics clean, your videos instantly become more professional.
The best video editing tips are often simple, but they require attention and practice. Clean cuts, clear sound, good pacing, readable captions, and proper export settings can make a huge difference. You do not need to overcomplicate the process. Focus on clarity, emotion, and flow, and your videos will naturally become more engaging.
Whether you are editing for YouTube, TikTok, Instagram, business, school, or personal projects, the goal is always the same: create a video that people enjoy watching. Keep learning, keep experimenting, and keep improving with every project. Over time, video editing will become easier, faster, and much more enjoyable.